On the rear suspensionof all DeLorean cars, there are left and right trailing (radius) arms that go from the left and right hub carriers forward to the frame. Where the trailing arms meet up to the frame there is a bushing and there is a bolt that goes through the frame and through the bushing and through the trailing arms. These bolts are called the rear suspension trailing arm bolts. This is also where the adjustment is made to set the rear alignment on the car using shims provided with the bolt kit.
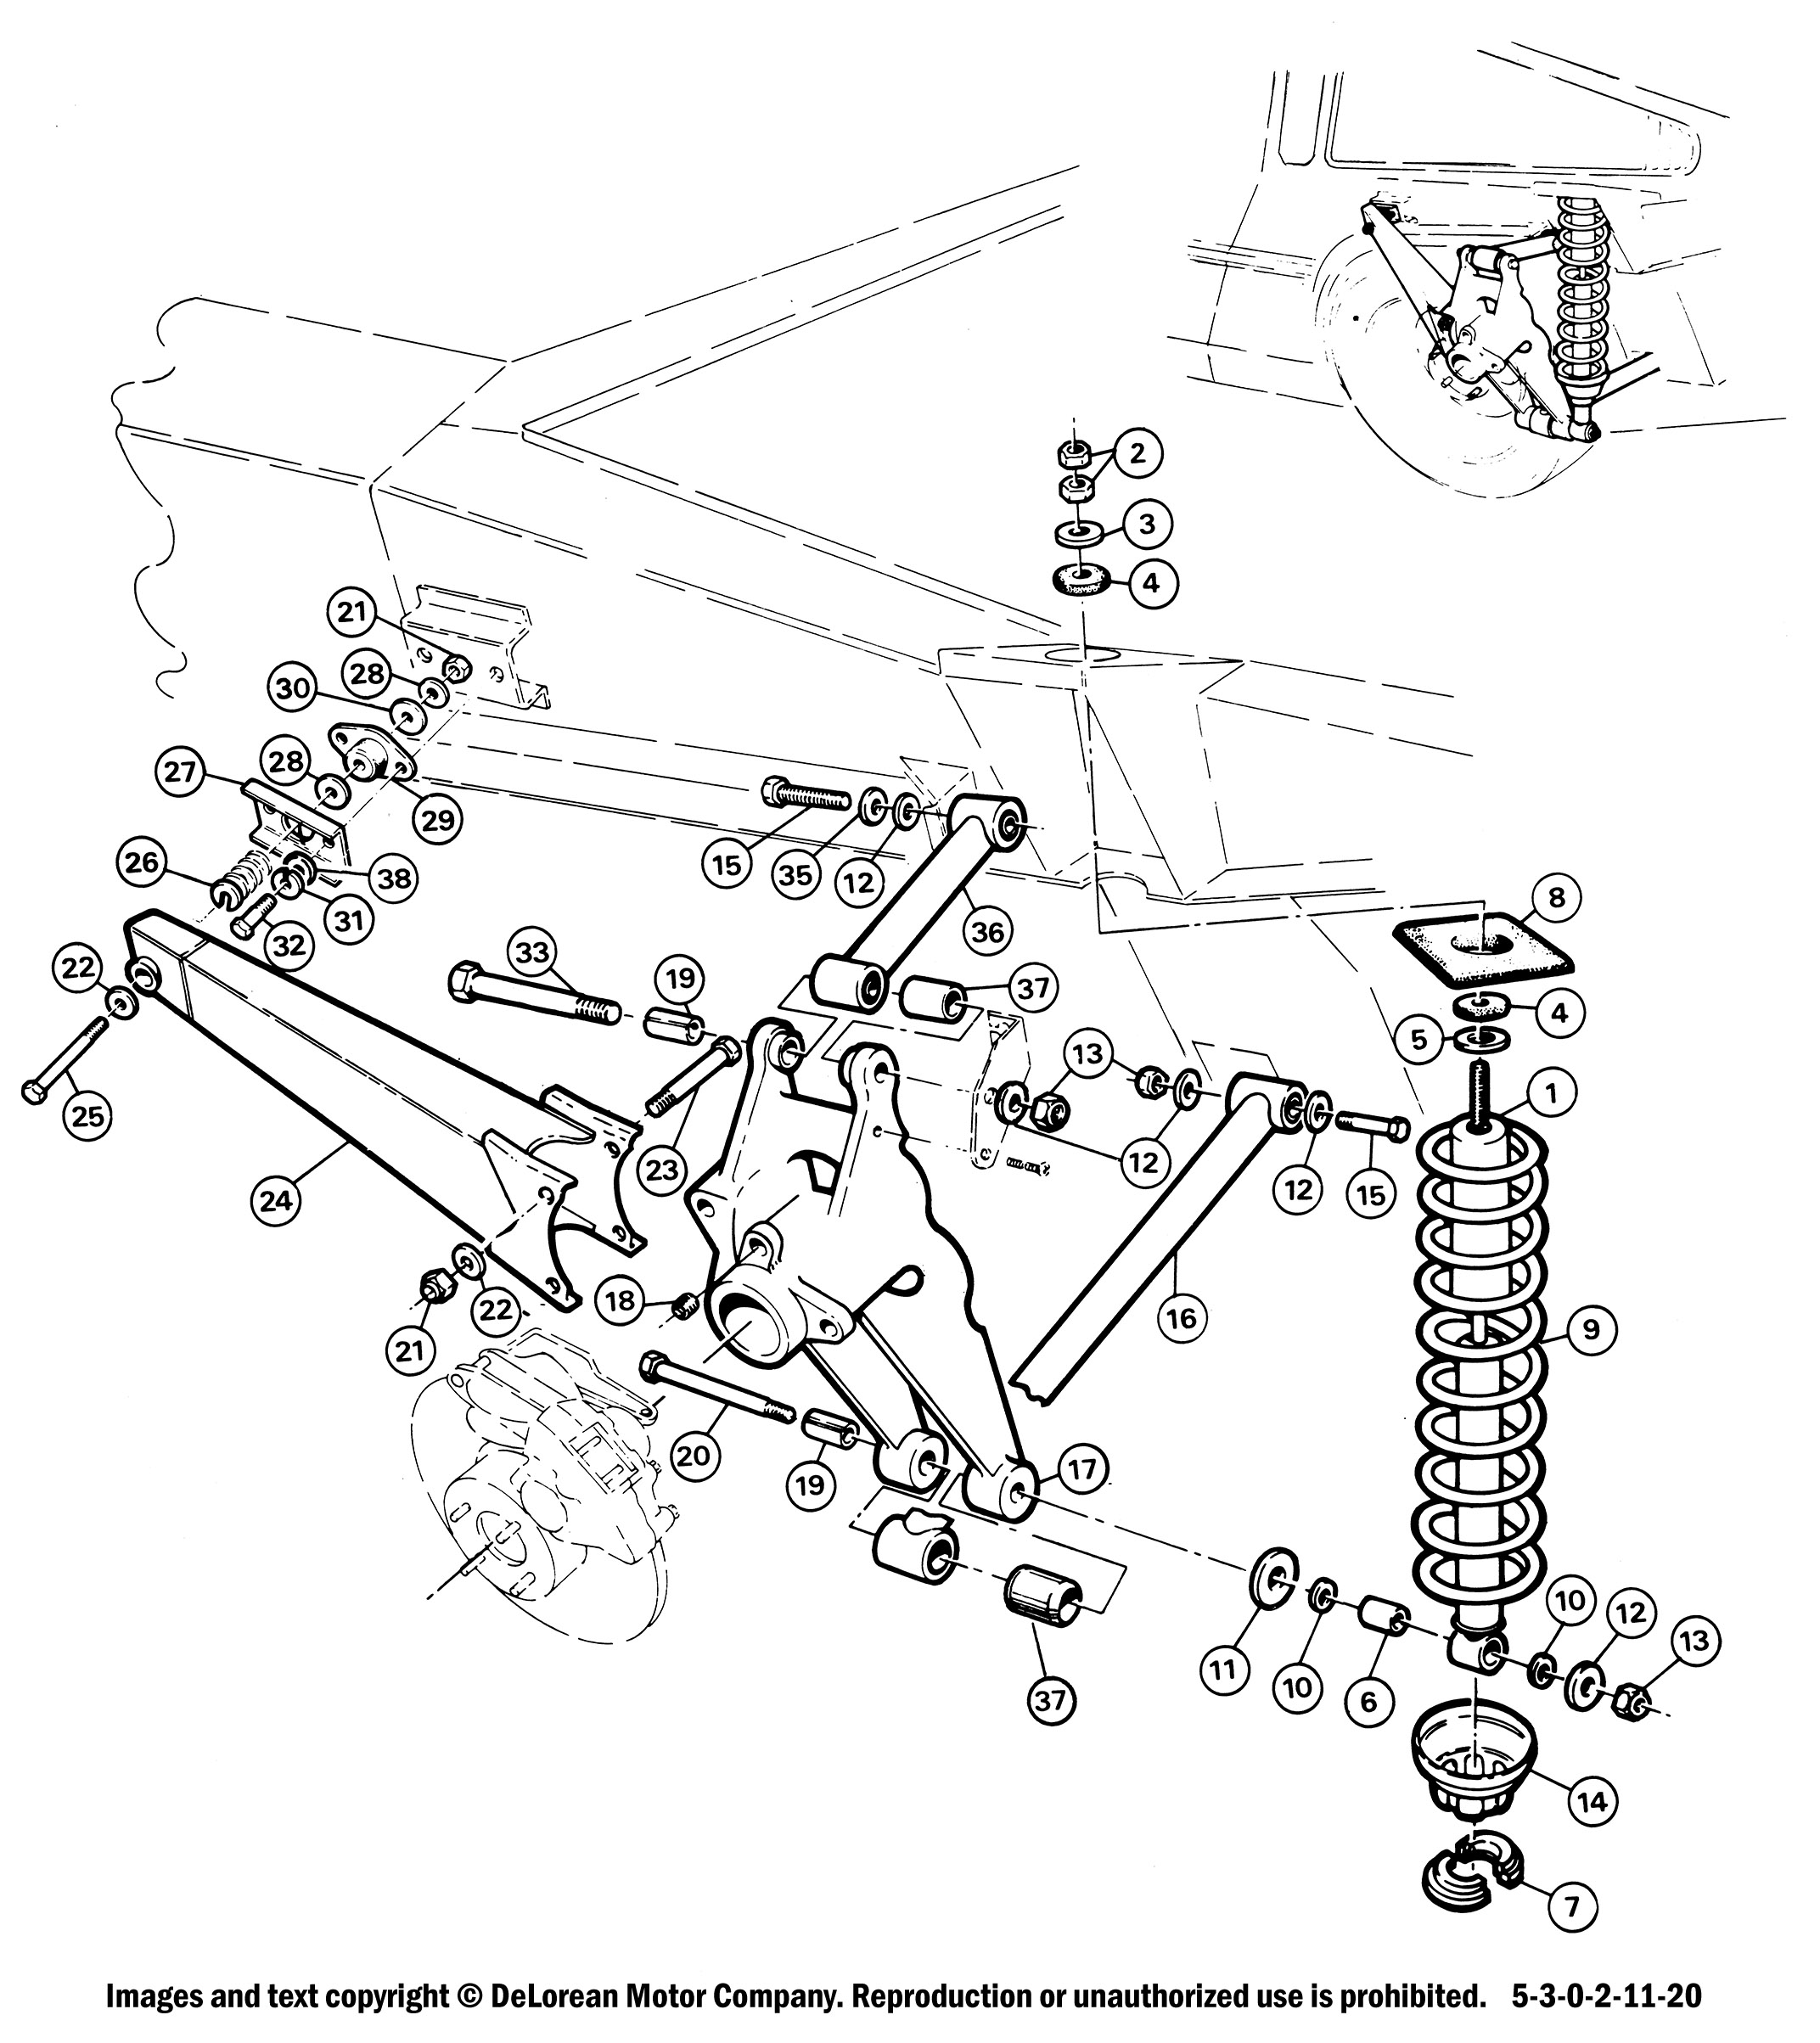
The trailing arm bolts are #25 in the image below.
Those bolts have a tendency to get loose and when they get loose they will bend and eventually can break which can be dangerous. The bolts are also subject to corrosion which can freeze the bolt into the arm and weaken the bolt. At DMC we recommend that these bolts be inspected once a year to make sure they are tight and not bent or corroded. This is most easily accomplished if you have access to a lift or car hoist to get the car up in the air, but you can also jack up the car and put it on jack stands.
DIAGNOSTICS:
For best access, remove the two Trailing Arm Shields (aka Air Deflector Plates) from under the car. This will likely require cutting or breaking off the fasteners and installing a trailing arm hardware kit PN K111230. The hardware kit is stainless, and an improved one-piece design, so in the future it will not be so difficult to remove the shields.
From the inside-out (the ‘inside’ being beside the transmission side of the frame), the head of the bolt is visible. Due to limited clearance on a automatic transmission, an offset 19mm box wrench must be used. In the case of an manual transmission a socket and breaker bar will work. Loosen the nut slightly and rotate the bolt in a clockwise motion while looking at the trailing arm. If the bolt is bent, up-and-down movement of the arm will be visible. If the bolt will not rotate at all, the bolt has frozen into the arm. This is a good indication that the bolts have started to corrode and must be replaced whether they are bent or not.
If you rotate the bolt a full 360 degrees and you don’t see any deflection/movement in the trailing arm then simply put a wrench on the nut and tighten them as tight as you possibly can. There is a torque specification (55 ft-lb/75 Nm) recommended but it’s one of those areas that’s pretty much impossible to get a torque wrench on. Additionally, there is so much resistance between the bushing and the bolt going through the arm that unless you were to physically remove it, and lubricate everything and put a new bushing on, its pretty hard to get an accurate torque reading to tighten it, so the preference is to tighten as tight as you possibly can and just re-check it once a year. Obviously, again, if the bolt is bent and you see any deflection/movement in the arm when moving it, you need to replace the bolts.
REPAIR NOTES:
When replacing the Trailing Arm Bolts, be sure to check the bushings for wear or damage (look for indications that the rubber has separated from the metal insert). If the bolt has been overtightened the center sleeve will collapse and the bushing will "balloon". This is also usually the cause of requiring more than the specified limit of 5 shims per side.
On an automatic transmission car, the bushings need to be removed to get the bolts out of the frame as the clearance around the transmission is very small. It can help slightly to detach the transmission mounts from the frame and allow the transmission to drop slightly, but this isn't necessary if you can work in the tight space allowed. Don't believe the hype that an allen head bolt should be used as a replacement - it's not necessary.
CAUTION: The bushings are held to the frame with two 8mm (13mm head) bolts that are threaded into nuts that are welded to the frame. In most cars there is a second nut on the inside of the frame on the bolt toward the rear of the car that locks the bolt to the welded nut. This nut is not shown on any of the parts diagrams. This second nut MUST be loosened (and held while removing the bolt) before attempting to remove the bolts, or the bolt head will shear off. If this happens, access for replacement involves lifting the body off the frame for access.
CAUTION: One of the bushing bolts on the passenger side of the car also contains the battery ground connection. We strongly recommend cleaning up the area and using new hardware on that particular bolt. This will often cure many oddball electrical issues on the car.
Revised DAS 6/23/2016 [bushing notes, corrosion, battery cautions]